Photoshop Replace One Color With Another, Transparency or Gradient
In this tutorial, we will show you a few simple methods on how to replace colors of an image or a photo with another color, to transparency or with complex colors such as gradient colors using Adobe Photoshop. Well, unless you have been living under a rock for the past few years, you would already know about Photoshop. It has been the most widely used picture editing software worldwide. If you are here as a newbie in Photoshop, I hope you will find this tutorial useful.
Without further ado, here’s how you can replace color of an image or a photo using Adobe Photoshop.
Photoshop replace one color with another
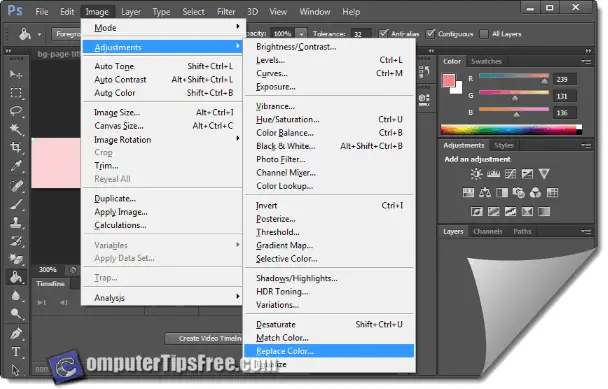
By default there’s already an option in Photoshop that does the color replacing and it’s called “Replace Color” which can be found under the Image menu. To do this,
- Open your image.
- Go to Image (from the menu bar), Adjustment, then Replace Color.
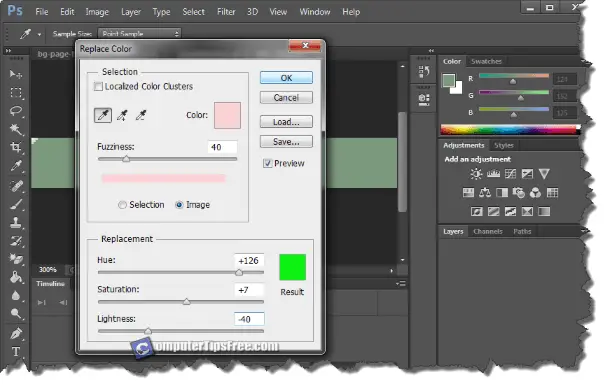
- In the selection area, select the color you want to replace. Simply click on anywhere of the part you wish to replace with the eyedropper tool.
- In the Replacement area, select the replacement color either by entering RGB your own or hover over any color you want and click on it.
- After you’ve done selecting the colors, Click “Ok”.
- The color of your selection will then be replaced. Repeat this to other parts if you have some complex gradient colors.
Adobe Photoshop replace color tool – Paint Bucket Tool
If you want to replace a color of an object in your image, and if the object has only plain colors but not some complex gradient colors, you can use the Paint Bucket tool to replace its color. This bucket tool does the same exact thing as the one in the classic Paint in Microsoft Windows. Paint bucket tool can be found under the Gradient tool as they are grouped together. Select your desired color, click on Paint bucket tool and then click on whichever part that you want its color to be replaced.

Photoshop replace background with Magic Wand Tool
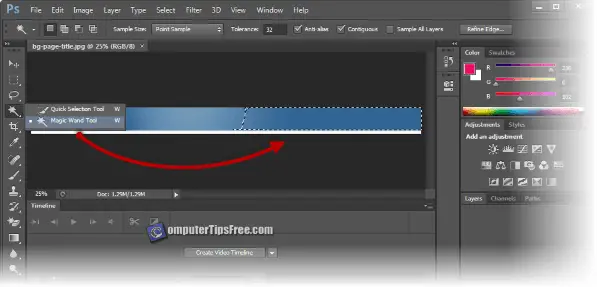
So, what if the color of an object (such as the background) in your image or picture is a gradient color? Well, my way of doing this is by using a combination of Magic Wand Tool and Paint Bucket/Gradient Tool (or whichever tool/layer modification you want). For example if you have an image containing both white and black pattern colors, you can use Magic Wand to select only the black pattern (or the white pattern) to replace. This is just an example of how I did it:
- Open your picture.
- Click on Magic Wand Tool and use it to select whichever part you would like its color to be replaced (Or use quick selection tool to select multiple parts and group them up).
- Configure your desired color by either entering your desired RGB or using the eyedropper tool.
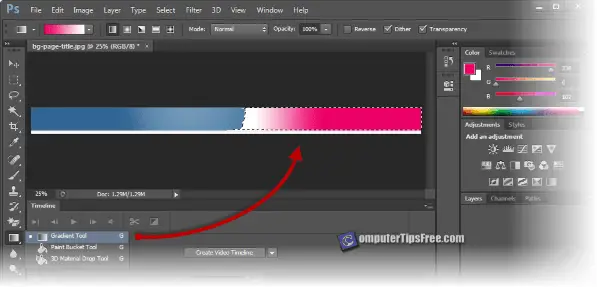
- Click on whichever color tool you want. In this case, I would use the Gradient tool.
- And then just apply the color on the area you’ve selected with Magic Wand. There you go. Repeat if you have complex colors to replace.
Photoshop replace color with transparent
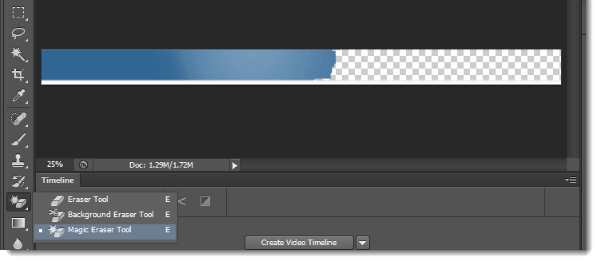
If you have a background layer ready for your photo, you can choose to either crop the object out with Magic Wand Tool or simply use Magic Eraser Tool. Magic Eraser Tool is able to erase whichever part you select to transparent. It somewhat does the same thing as Magic Wand where it will predict the part that you’ve selected and erase the possible areas similar to the one you’ve selected. Use it wisely. Magic Eraser tool can be found under the Eraser tool group.
The above methods of replacing color are just a few simple ones out of many other possible ways. There are a lot more much advanced methods to do this. Photoshop is not a science. We just have to be creative and try out every possible combination of tools available and get used to them.


