Windows 11/10 How to Troubleshoot and Fix Common Errors
In previous Windows version, we used to always have to go through lots of hassles trying to identify the cause of a problem in Windows when it occurs out of no where without a single warning.
Now, in Windows 10, it has improved so much to a point that the troubleshooting tool actually (finally) helps solving most errors. We can see Microsoft really have done something to improve its tool for users to self repair the common problems in their PC. Unlike most of previous build where we still have to search all over the internet just to find a solution that Windows can easily solve itself.
In this post, we will show you how to use the troubleshoot tool in Windows 10, how to use System File Check to fix system errors, how to run DISM check to repair Windows Update problems, and all sorts of Windows 10 how to fix common errors.
How to Troubleshoot in Windows 10
Windows 10 Troubleshoot is a tool to automatically find and fix a certain selected area of problems you have with your PC.
To run troubleshoot for a certain problem, go to Start menu in Windows 10. Search for Troubleshoot and open it. Select the area in which you are currently facing problem with. Click on Run the troubleshooter to start the troubleshooting process.
The troubleshoot supports internet connections, audio, printer, Windows Update, Bluetooth, workplace connection using DirectAccess, hardware and devices, incoming connection, keyboard, network adapter, power, program compatibility, recording audio, search and indexing, shared folders, video playback, Windows Store apps, and most importantly it can even troubleshoot Blue Screen if you have recently encountered any.
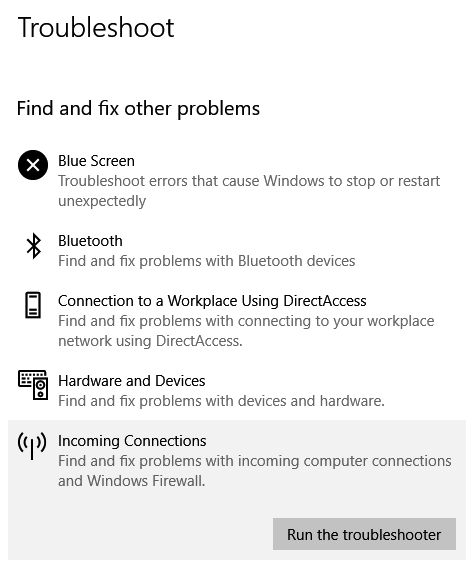
In Windows 11, you can find the troubleshooter via Settings (press Win + i), and navigate to System > Troubleshooter. You can also access to more troubleshooters by selecting Other troubleshooters. A list of most frequently used troubleshooters and those for specific hardware will be shown. You can also find a decent number of troubleshooting guides on this Windows 11 How to site if you encounter error that couldn’t be solved by the built-in troubleshooters.
How to run System File Check in Windows 10
This is a slightly advanced fix that could do the magic in finding and fixing corrupted system files in your OS. This is especially useful if you have an error that relates to your Windows OS files.
Even if it’s not the OS files that is causing your problem, running SFC will do no harm to your PC. What it actually do is that it will automatically scan for any corrupted or missing system files, and repair or replace them when found.
To run SFC in Windows 10, go to Start menu. Search for Command Prompt. Right-click it and then select Run as administrator. It is very important for CMD to have admin permission as it’s needed to run SFC. In the command prompt, type sfc /scannow and hit Enter.
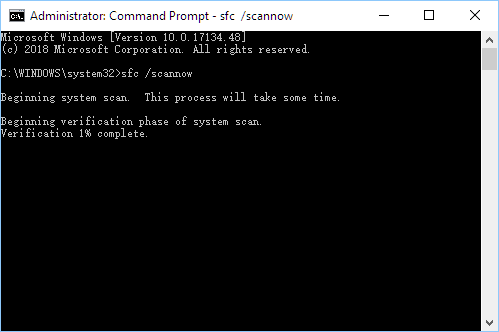
The file check should start running now. It may take a while. Restart your computer when the scan is done.
How to run DISM check
If you have an issue related to Windows Update, running DISM scan should be able to solve your Windows Update errors.
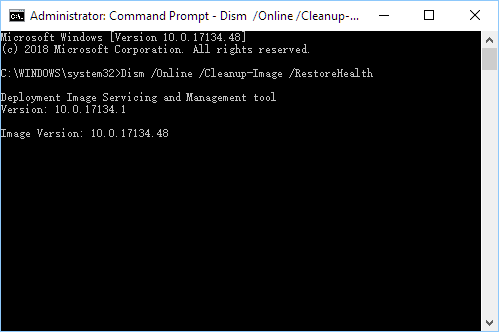
To run DISM tool, go to Start menu in Windows 10. Type command prompt, right-click it and select Run as administrator. In the command prompt, type the following command.
Dism /Online /Cleanup-Image /RestoreHealth
DISM which stands for Deployment Image Servicing and Management is a Windows 10 built-in tool to automatically scan and repair any Windows Update error found. It may take up to 30mins for the process to complete. Restart your PC when it’s completed. Run Windows update again.
When you meet a problem, before you try anything else suggested elsewhere, try all the above first. If the above fix works to solve your problem, which in my case they mostly did, it would definitely save you tons of time, energy and possibly your hard earned money.

